Visualizer 3D Studio3D Analysis: Bookmarks
Professional Edition
Bookmarks are a very useful tool to set special markers with additional information at certain measuring points within the scan images. Not only can you mark the position itself but also mark a whole region around the scan value and add additional descriptive information.
This section gives an overview about using and creating bookmarks.
Please be aware that creating and editing bookmarks is limited to the Visualizer 3D Studio - Professional Edition only!

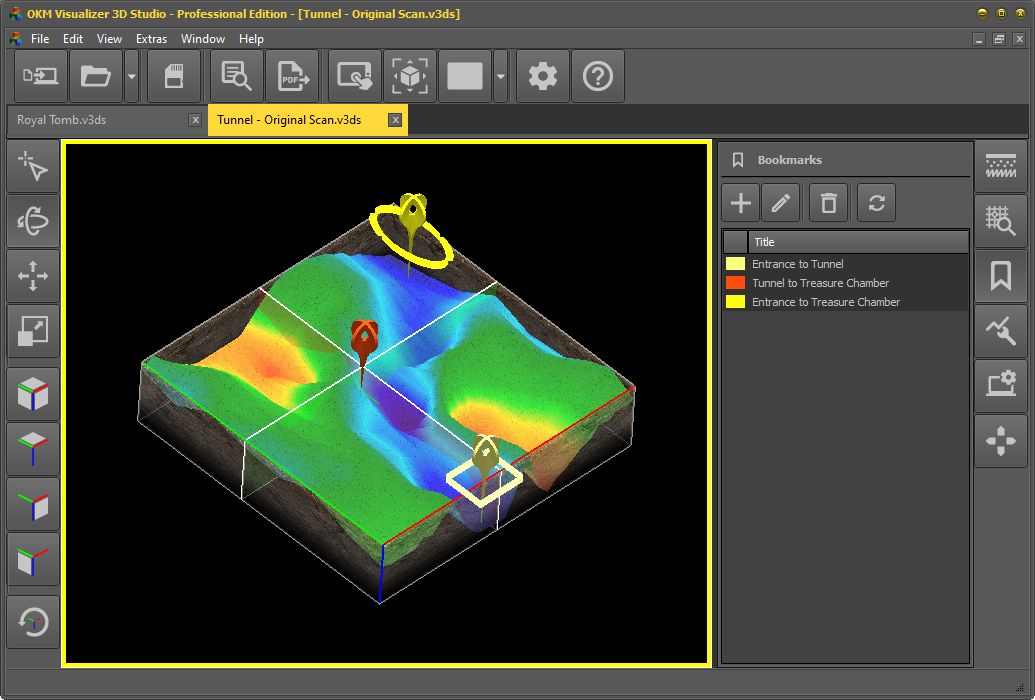
Figure 1 displays the Bookmark Panel of the Right Sidebar that consists of a toolbar on the top and a bookmark list right below. The toolbar contains following buttons:
 |
Add Bookmark Push this button to create a new bookmark at the position of the crosshairs (3D cursor). After pushing the button, the dialog from figure 2 will appear on screen to enter all the detailed information. |
 |
Edit Bookmark Push this button to edit the selected bookmark at the crosshairs. After pushing the button, the dialog from figure 2 will appear on screen to change all the detailed information. |
 |
Delete Bookmark Push this button to delete the selected bookmark at the crosshairs. |
 |
Refresh List Push this button to refresh the list of bookmarks in case it is out of sync. |
Navigating the bookmarks
There are several methods to select a certain bookmark or to go through all existing bookmarks easily.
One way is to simply click onto one of the entries in the bookmark list. Then the crosshairs (3D cursor) will jump to the according bookmark which becomes selected.

Another way is to position the crosshairs manually by mouse (when in picking mode or by holding down the Alt key when pushing the mouse button) or arrow keys onto the according measuring point.
Alternatively, you may also use a special shortcut to jump to the next bookmark, which is Ctrl + Alt + B. Continue executing this shortcut until you reach the bookmark of your choice.
Creating and editing new bookmarks
When you like to add a new bookmark at a certain measuring point, you first have to set the crosshairs (3D cursor) to that very point (also when you want to edit an existing bookmark). Then you can push the  button from he toolbar of the Bookmark Panel to bring up the dialog from figure 3.

In the Bookmark Dialog you can add/edit all the information that can applied to the measuring point:
-
Color
Click the color box to change the color of the bookmark representation. Depending on the scan image color of the selected measuring point this color box is preconfigured with the appropriate inverse color.
-
Title
Enter a short title of the bookmark to make it as easy as possible to identify it later within the list of bookmarks.
-
Notes
Use this text field to enter any additional information or remarks regarding the selected measuring point.
-
Outline
Next to the visual bookmark indicator, you may also select an additional outline (area border) around the bookmark center. There are three different options available:- None: Do not show any outline at all.
- Rectangle: Show a rectangular outline with the dimensions defined with Impulses and Scan Lines.
- Circle: Show a circular/elliptical outline with the dimensions defined with Impulses and Scan Lines.
-
Impulses
This value defines the height of the outline measured in impulses.
-
Scan Lines
This value defines the width of the outline measured in scan lines.
Besides the information you can add into the input fields, additional information like GPS Location and Crosshairs Information are provided.
All those information and data can be included in the PDF Report that can be generated by Visualizer 3D Studio.